
Hello loves,


Was anyone else absolutely oblivious about eyebrows until senior year of high school? Just me? Seriously, though. I wasted so much time thinking that my makeup was absolutely perfect while I left my brows untouched.
Normally, this is fine. But, my brows like to not grow like they’re supposed to. As you can see from the absolutely bare front part of my brow. Yes, they hate me! Now I look back at my high school pictures and cringe.
Anyways, let’s talk about filling in brows!
I do my brows like I color. First, I outline.


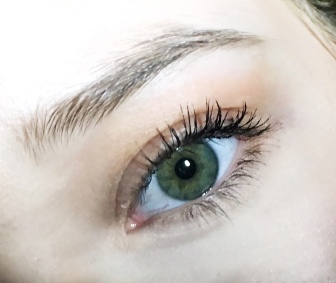
For this first look, I am using the It Cosmetics Brow Power Universal Eyebrow Pencil. I always start by creating the bottom edge of my brows. Then, I will trace the upper part of my brows. (I leave the inner third alone- just to make sure that they don’t look too blocky.)


Then, I start filling in the center, starting with the back part first. When I fill in the front part, I like to create little lines with my pencil to simulate brow hairs. And finish them up by brushing through them with a spooly and adding brow gel if you desire.

This is what I do every day. It’s super fast and I don’t think it’s too dramatic for everyday!
Now for something a little more dramatic. A slight ombre brow.


This is a little bit different. I am taking a light shade of brown, specifically, Lazarus from the Kat Von D Palette and an It Cosmetics brow brush, and filling in the front part of my brow only. I use the same technique of outlining and then doing light upward strokes to simulate brow hairs.

Next, using the same brush I will take Saleos from the Kat Von D Palette, and fill in the back end of my brow. This creates a subtle ombre that is more dramatic.

Like this! I tend to do these brows when I am going out or I’ve got some roots going on! Lol.
And just for fun- A colored pastel brow!


I am using Peace from my Urban Decay Palette to do the first half of my eyebrow. Anytime you are going to use shadow on your brows, make sure they are very pigmented for the best results.

Next, I am going in with a dark purple called Ransom, which is also from my Urban Decay Palette. I am putting this on the end of my brows and using any left over product on my brush to blend the two colors together.

Eventually, I get something like this. It is definitely bold but it’s very fun to do!
And that’s it for this tutorial! I hope you enjoyed it and thank you so much for reading! I love you all!


💯💯💯
LikeLiked by 1 person
🤓😍❤️
LikeLike
Brilliant post. . Love the end result
LikeLiked by 1 person
Thank you so much! 😍
LikeLike
Love it! The color one is amazing! Now, I might have to try doing my brows!
LikeLiked by 1 person
Yay! Thank you! You should definitely give it a try! ❤️
LikeLiked by 1 person
The colored one is so fun!
LikeLiked by 1 person
Thank you so much!
LikeLiked by 1 person
Ugh! Your brows are everything I want mine to be!
https://beautyrefuge.wordpress.com
LikeLiked by 1 person
Awww thank you! You’re so sweet! ❤️
LikeLike
Hey, I’m a new blogger and was wondering if you would take a look at my blog and 2 posts and give me some advice xx
Thanks Hope
LikeLiked by 1 person
You’re doing great so far! I love both of your posts! My biggest blogging advice would be to write about what you enjoy and keep things helpful and informative! Keep doing what you’re doing! 😊
LikeLike